
Merchant Console Products Database
The Products page in your Merchant Console allows you to add, edit, track, and manage all of your products - both physical and virtual - through a single, easily customizable database. In the Products database you can group and view items by name, category, price, location and more.
Product Database
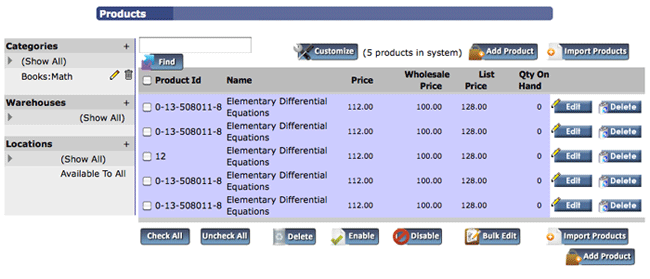
From the main page of the Products tab you can view a basic listing of all of your products. The database is indexed by the product name, but you can change the index by clicking on the name of the field you would like to use at the top of the list. The database will display 100 products per page (there is a tab at the bottom of the screen to move to the next page).
At the top of the product list you can always see the total number of products currently in the system. From this screen you can sort, edit and delete any of the products in your database. On the left is a toolbox containing a list of Categories, Warehouses, and Locations which can also be used to group and sort products.
The default settings for this page include the following:
| Field | Description |
|---|---|
| Product ID | a merchant assigned product identification number |
| Name | the name or title of the product |
| Price | retail price of the product |
| Wholesale Price | wholesale price of the product |
| List Price | list price of the product (MSRP) |
| Quantity on Hand | total number of product currently available |
To sort the list by any of the above fields, click the title of the field in the header line. Click again to switch from ascending to descending order and vice versa.
Database Key
Each product in your database will be shaded according to its status: Enabled (light blue), Disabled (white), or Low Inventory (pink). Each product's status can be checked or altered by clicking the Edit button at the right of the item's row and saving the desired product information on the Product Details screen.
Customize Display
The display page can be customized by clicking the Customize button at the top of the page and adding or subtracting fields to be displayed. Possibilities in addition to the default options are:
| Field | Description |
|---|---|
| Ref Product ID | a system assigned product reference number |
| SKU | product's Stock Keeping Unit number |
| UPC | product's Universal Product Code |
| Category | category in which the product has been placed |
| Quantity on Order | total number of products that have been ordered |
| Enabled | product's system status |
| Taxable | product's tax status |
| Model | product's model number |
| Weight | product's total weight |
| Ship Weight | product's weight adjusted for packing and shipping purposes |
| Manufacturer | product's manufacturer |
| Physical Good | denotes whether the product is physical (e.g. a hardcover book) or virtual (e.g. an ebook) |
| Minimum Quantity | total number of products required in a single purchase |
| Image URL | web location of product image |
| URL | web location of product description or other information |
| Create Date | date on which the product was entered into the database |
| Modified Date | date on which the product's information was last altered |
Note: Not all options apply to every product.
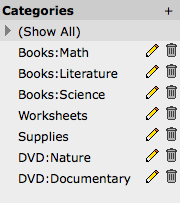
Categories
At the top of the toolbox to the left of the main product display, is a complete list of your product categories. From this toolbox, you can edit, add and delete product categories as needed, as well as use the list to view only items in a particular category.
View Products by Category
To view items in a particular category, simply click the name of the category you would like to view and only items from that category will be displayed. You may also use the category toolbox in conjunction with the Warehouses and Location toolboxes to further narrow your search and view only items in a certain category in a particular warehouse.
Add
To add a new category, click on the plus (+) sign on the right hand side of the Categories header.
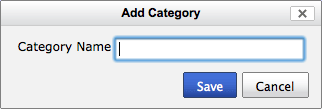
Enter the name of the new category and click the blue Save button. The category will be added to the list in your toolbox and you may then add any of your products to the new category.
Edit
To edit a category, click the pencil icon to the right of the category you would like to change.
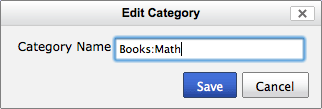
Enter the new category name and click the blue Save button to apply, or click Cancel to keep the category unchanged.
Delete
To delete a category, click the trash can icon to the right of the category name. You will be asked to confirm before the category is removed from the list of categories.
Note: a category can only be deleted if it contains no active products. To delete a category with one or more products, you will need to first remove the products from the category.
Warehouses
At the center of the toolbox to the left of the main product display (just below your list of categories), is a complete list of your product warehouses. From this toolbox, you can edit, add and delete warehouses as needed, as well as use the list to view only items located in a particular warehouse.

View Products by Warehouse
To view items located in a particular warehouse, simply click the name of the warehouse you would like to view and only items from that warehouse will be displayed. You may also use the Warehouses toolbox in conjunction with the Categories and Location toolboxes to further narrow your search and view only items in a certain category in a particular warehouse.
Add
To add a new warehouse to your list, click on the plus (+) sign on the right hand side of the Warehouses header.
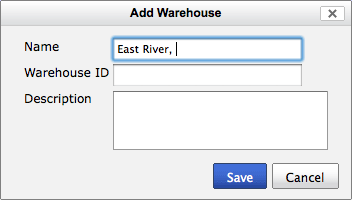
In the pop-up box, you can enter the name of the new warehouse, as well as the warehouse ID number and a brief description, then click the blue Save button. The warehouse will be added to the list in your toolbox and you may then add any of your products to the new warehouse within the product database.
Edit
To edit a warehouse, click the pencil icon to the right of the warehouse you would like to change.
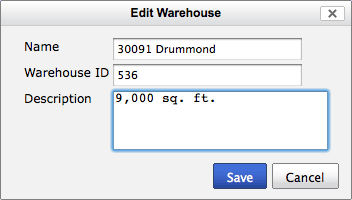
Enter the new warehouse name, alter the ID number, and/or add or edit the description as desired, then click the blue Save button to apply, or click Cancel to keep the warehouse information unchanged.
Delete
To delete a warehouse, click the trash can icon to the right of the warehouse name. You will be asked to confirm before the warehouse is removed from the list of warehouses.
Locations
Edit Product
To edit product details, quantity, description, or location, click the edit button to the right of the item you wish to change.
When you have altered the details in any of the four tabs (each described below), click the Save button to save and return to the product database, the Apply button to save and remain on the product editing screen, cancel to reverse unsaved changes and return to the products database, or Create a Copy to create a duplicate item with the same information.

Details
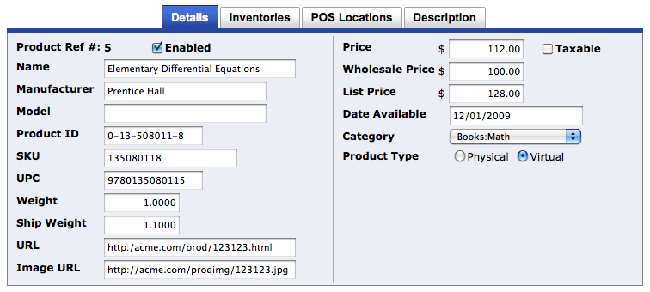
The details tab contains basic product information, such as name, ID, UPC, price and more. You can also change an item's tax status and enable or disable the item as necessary.
| Product Ref # | system assigned product identification number |
|---|---|
| Enabled | check box to enable item for sale (disabled items will appear with a white background in the product list, enabled items appear on a light blue background) |
| Name | product name |
| Manufacturer | product's manufacturer |
| Model | product's model number |
| Product ID | user assigned product identification number |
| SKU | product's Stock Keeping Unit number |
| UPC | product's Universal Product Code |
| Weight | product's total weight |
| Ship Weight | product's weight adjusted for packing and shipping purposes |
| URL | web location of product image |
| Image URL | web location of product description or other information |
| Price | product's price |
| Taxable | denotes the product's tax status - check the box is the product is taxable |
| Wholesale Price | product's wholesale cost |
| Date Available | date the item will be available (leave blank if item is available immediately |
| Category | select a category from the drop down menu (you may also create a new category by selecting Add New Category at the bottom of the drop down menu and entering the new category name in the pop up box) |
| Product Type | denotes whether the product is physical (e.g. a hardcover book) or virtual (e.g. an ebook) |
Inventories
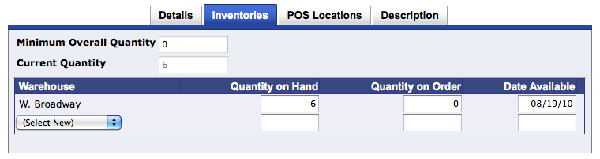
The inventories tab allows you to adjust the quantity of each product as necessary. You may also assign the item a minimum quantity and break down the total inventory by warehouse to better track your stock.
To assign quantities to individual warehouses, choose a warehouse from the drop down menu, then enter the quantity of the item in stock. You may add as many warehouses as necessary.
POS Locations

The POS (Point of Sale) Locations tab allows you to edit the locations to which the item in question is available. You can make the item available to all POS locations, or select a limited number of POS location to which the item is available.
Description
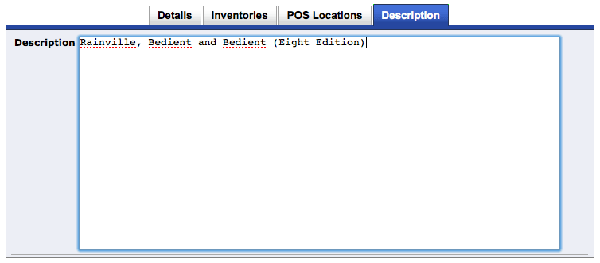
In the Description tab you can enter a description of the item, or any other additional details that you would like.
Bulk Edit
Use the Bulk Edit feature to adjust the following fields: Price, Wholesale Price, List Price, Quantity on Hand, Quantity on Order, and Date Available. Click the Bulk Edit button, then edit any of the fields as necessary.
To edit products in a particular category, warehouse, or both, use the toolboxes on the left. For more information about the Category and Warehouse toolboxes, see above.
Please Note: You can only edit fields which are visible on the main products database page. you can adjust the visible fields using the Customize button at the top of the database display.
Enable
You can enable multiple products at once by selecting the products you would like to enable using the checkboxes on the left hand side of the database. Select the products, then click the Enable button at the bottom of the list. You will be asked to confirm that you wish to enable the selected products before proceeding.
Add Product
To add a single product to the products database, click one of the Add Product buttons located at the top or bottom right of the product list. On the new product screen you can add item details such as name, price, weight, description, warehouse locations and more.
Details
The details tab contains fields in which to enter basic product information, such as name, ID, UPC, price and more. You can also add an item's tax status and enable or disable the item as necessary.
| Product Ref # | system assigned product identification number |
|---|---|
| Enabled | check box to enable item for sale (disabled items will appear with a white background in the product list, enabled items appear on a light blue background) |
| Name | product name |
| Manufacturer | product's manufacturer |
| Model | product's model number |
| Product ID | user assigned product identification number |
| SKU | product's Stock Keeping Unit number |
| UPC | product's Universal Product Code |
| Weight | product's total weight |
| Ship Weight | product's weight adjusted for packing and shipping purposes |
| URL | web location of product image |
| Image URL | web location of product description or other information |
| Price | product's price |
| Taxable | denotes the product's tax status - check the box is the product is taxable |
| Wholesale Price | product's wholesale cost |
| Date Available | date the item will be available (leave blank if item is available immediately |
| Category | select a category from the drop down menu (you may also create a new category by selecting Add New Category at the bottom of the drop down menu and entering the new category name in the pop up box) |
| Product Type | denotes whether the product is physical (e.g. a hardcover book) or virtual (e.g. an ebook) |
Inventories
The inventories tab allows you to enter the quantity of each product as necessary. You may also assign each item a minimum quantity and break down the total inventory by warehouse to better track your stock.
To assign quantities to individual warehouses, choose a warehouse from the drop down menu, then enter the quantity of the item in stock. You may add as many warehouses as necessary.
POS Locations
The POS (Point of Sale) Locations tab allows you to add the locations to which the new item is available. You can make the item available to all POS locations, or select a limited number of POS location to which the item is available.
Description
On the Details tab you can enter a description of the item, or any other additional details that you would like.
Import Products
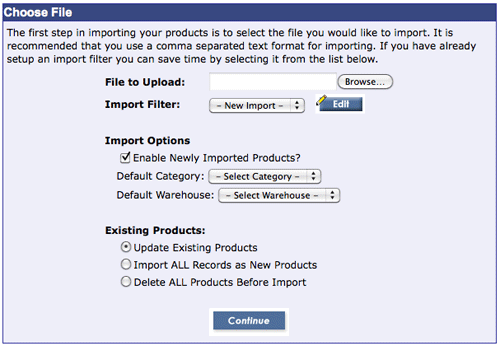
The first step in importing your customers is to select the file you would like to import. It is recommended that you use a comma separated text format for importing.
You can use our pre-made template if you'd like as an example. The template has multiple tabs inside.
You can use an Import Filter to organize the incoming data.
The following steps are required to successfully import an existing products file. Some of the options (category, warehouse, etc. may be left blank and changed later. This option is recommended if your file contains items in multiple categories or warehouses.)
- Click the Browse button.
- Select the file you wish to upload from your hard drive.
- Select an Import Filter, or choose New Import. (If this is your first import, choose New Import; you will have a chance to save your filter setting later.)
- Enable Newly Imported Products (uncheck to keep new items disabled and enable later if necessary)
- Select a Category for the new items, if desired.
- Select a Warehouse for the new items, if desired.
-
Select action for existing products:
- Select "Update Existing Products" if the file you are about to upload contains updated information on existing products. Warning: existing products database information will be replaced with new data.
- Select "Import ALL Records as New Products" to keep existing product information and add the new products to your product database.
- Select "Delete ALL Products Before Import" to eliminate all existing product data and replace your entire product list with the newly imported product information.
- Click continue when ready.
Map Fields
If you select New Import, you will need to map the fields before the items can be added to the products database. Select a category for each column (Name, Description, Price, Weight, URL, etc.) based on what information it contains. When you are done, click Continue at the bottom of the screen. (You'll have the chance to save the mapped fields in a moment.)
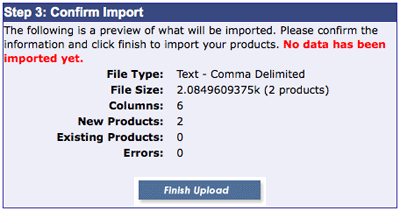
Confirm Import
Double check the information that will be imported, including file size, type and number of products to be imported, then click "Finish Upload" to continue and save the products to the database.
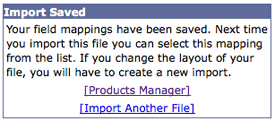
Import Completed/Import Saved
The Import Completed screen displays the results of your import. On the Import Completed screen, enter a name for the import filter settings to save them for future use. Once you have saved your settings, the name of the import filter will appear in the drop down menu on the initial import screen.
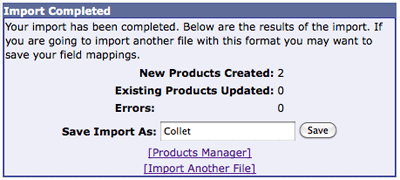
To return to the Products Manager without saving, click the Products Manager link below the Import name field.
To import another file without saving your import settings, click the Import Another File link.
If you save your settings, you will be taken to the final confirmation screen from which you can return to the products manager or import another file.
Export
Your product database may be exported by selecting the type of file you would like to export (csv or tab delimited) from the drop down menu to the left of the Export button, and clicking Export. The data can then be accessed via an offline program such as Microsoft Excel, Quicken or Quick Books.
The Print button is located at the bottom right of the products database. You can print the entire product database, or you can use the Categories and Warehouse tool box on the left to print only a certain items. The fields that you have selected for display will be included in the print file.